
Secure ArcGIS Feature Service Webhooks with Node.JS and Twilio
We recently published an article exploring how JavaScript can be used in the ArcGIS ecosystem. CartoLab is a strong supporter of JavaScript and Node.JS for building innovative solutions with ArcGIS. In this article, we will explore how Node.JS can be used to receive ArcGIS Hosted Feature Service webhooks and use the Hash-based message authentication code (HMAC) to securely verify the authenticity of the request. To illustrate the flexibility of Node.JS, we will also use Twilio to send SMS messages based on updates to the feature service.
Webhooks
A webhook can best be thought of as being an API in reverse. Traditionally, an API call is made FROM your application TO a web resource over HTTP. Visualizing the reverse, webhooks are API calls FROM a resource TO your application over HTTP. Webhooks are usually triggered by some event or scheduled interval. For our example, we will setup a Hosted Feature Service webhook that will be prompted by a ‘Feature Update’ event.
Webhooks can be configured by ArcGIS Administrators using the REST admin directory. Below is the empty form we will be filling out to accomplish our workflow.

Scenario
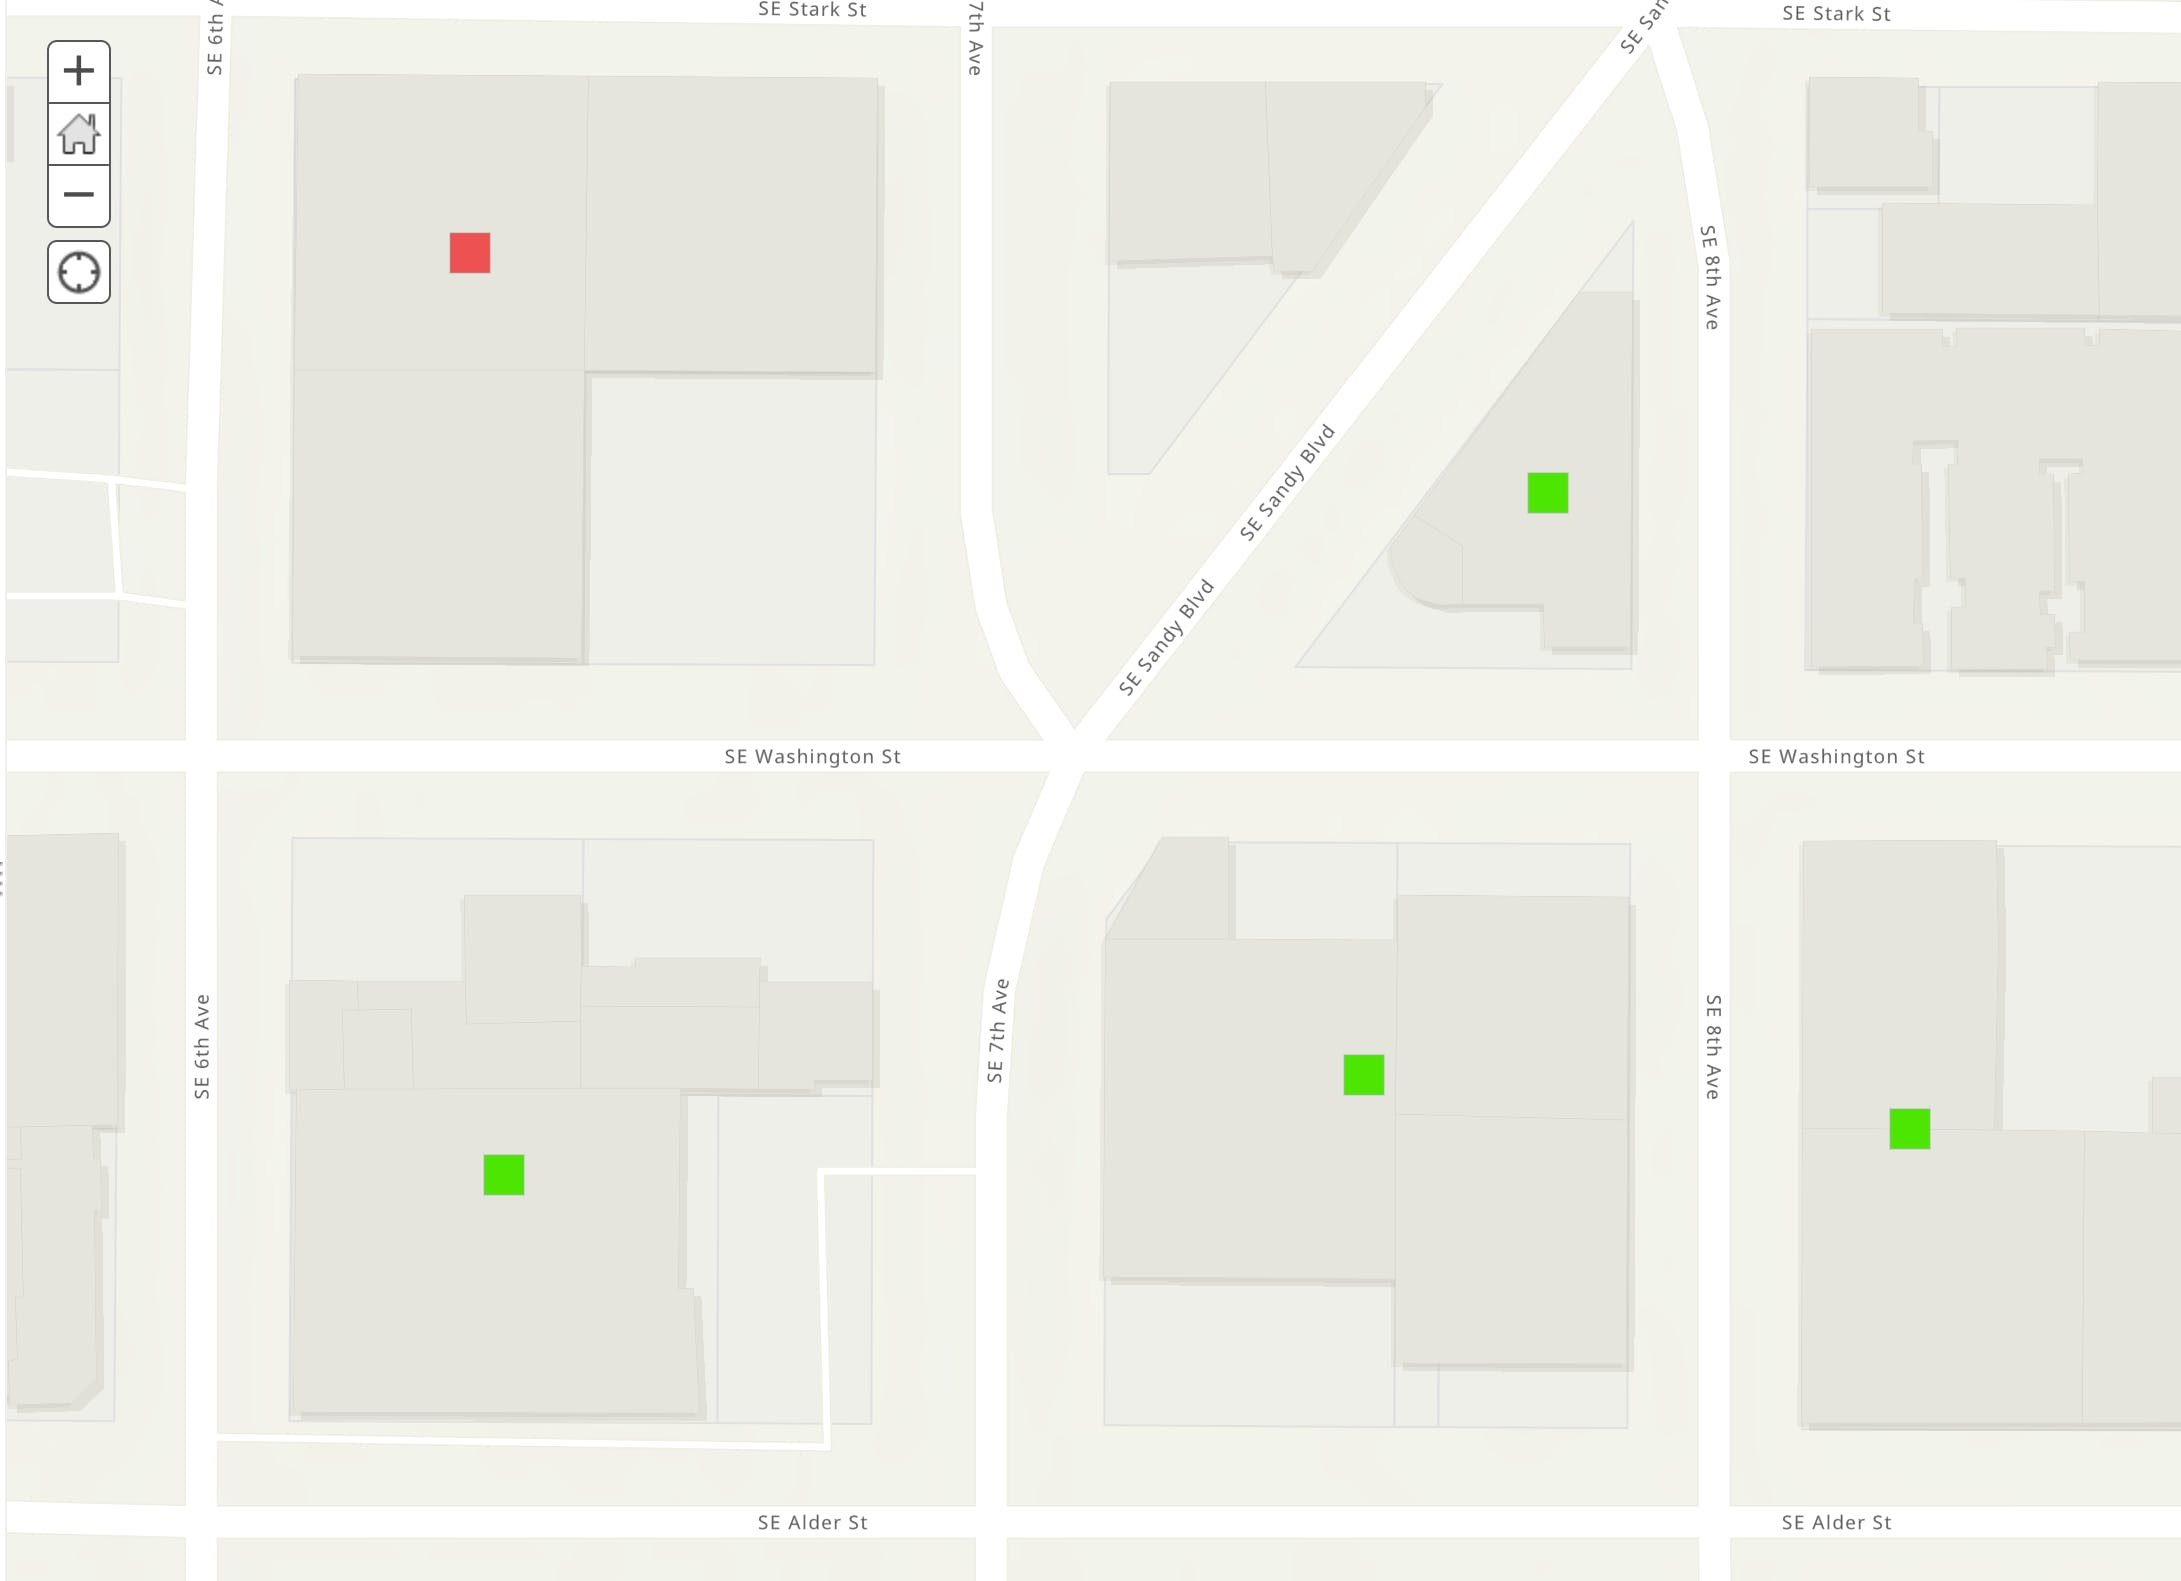
For this article, we will be building a minimal example for solving a real-world problem. In our scenario, we have a feature service that represents power utility status for residential addresses. The feature service contains a domain drop-down to represent an address’s power status condition as Green (power working), Yellow (intermittent power) or Red (power outage). We will setup a webhook in ArcGIS to notify our application of any updates. If we identify that a feature’s status field was updated to condition ‘Red’, we want to send a SMS message so that crews can investigate the power outage.
To accomplish this, we’ll want to accomplish the following steps:
Setup a webhook to notify our application of feature service updates
Create an HTTP endpoint to receive webhook requests from ArcGIS
Securely verify that the ArcGIS webhook request is authentic
Determine what feature was updated, and check its power status value
Send a SMS message if there is a power outage at the address
Setup
An ArcGIS Hosted Feature Service was created and setup with a ‘Status’ field based on a domain table with three options: Green (power working), Yellow (intermittent power) and Red (power outage). The service was populated with sample locations, seen below:
Using the ArcGIS REST Administrator Directory, I populated the required fields necessary for creating a webhook. Let’s walk through the steps I took to populate the form and get everything connected. The completed form is seen below:
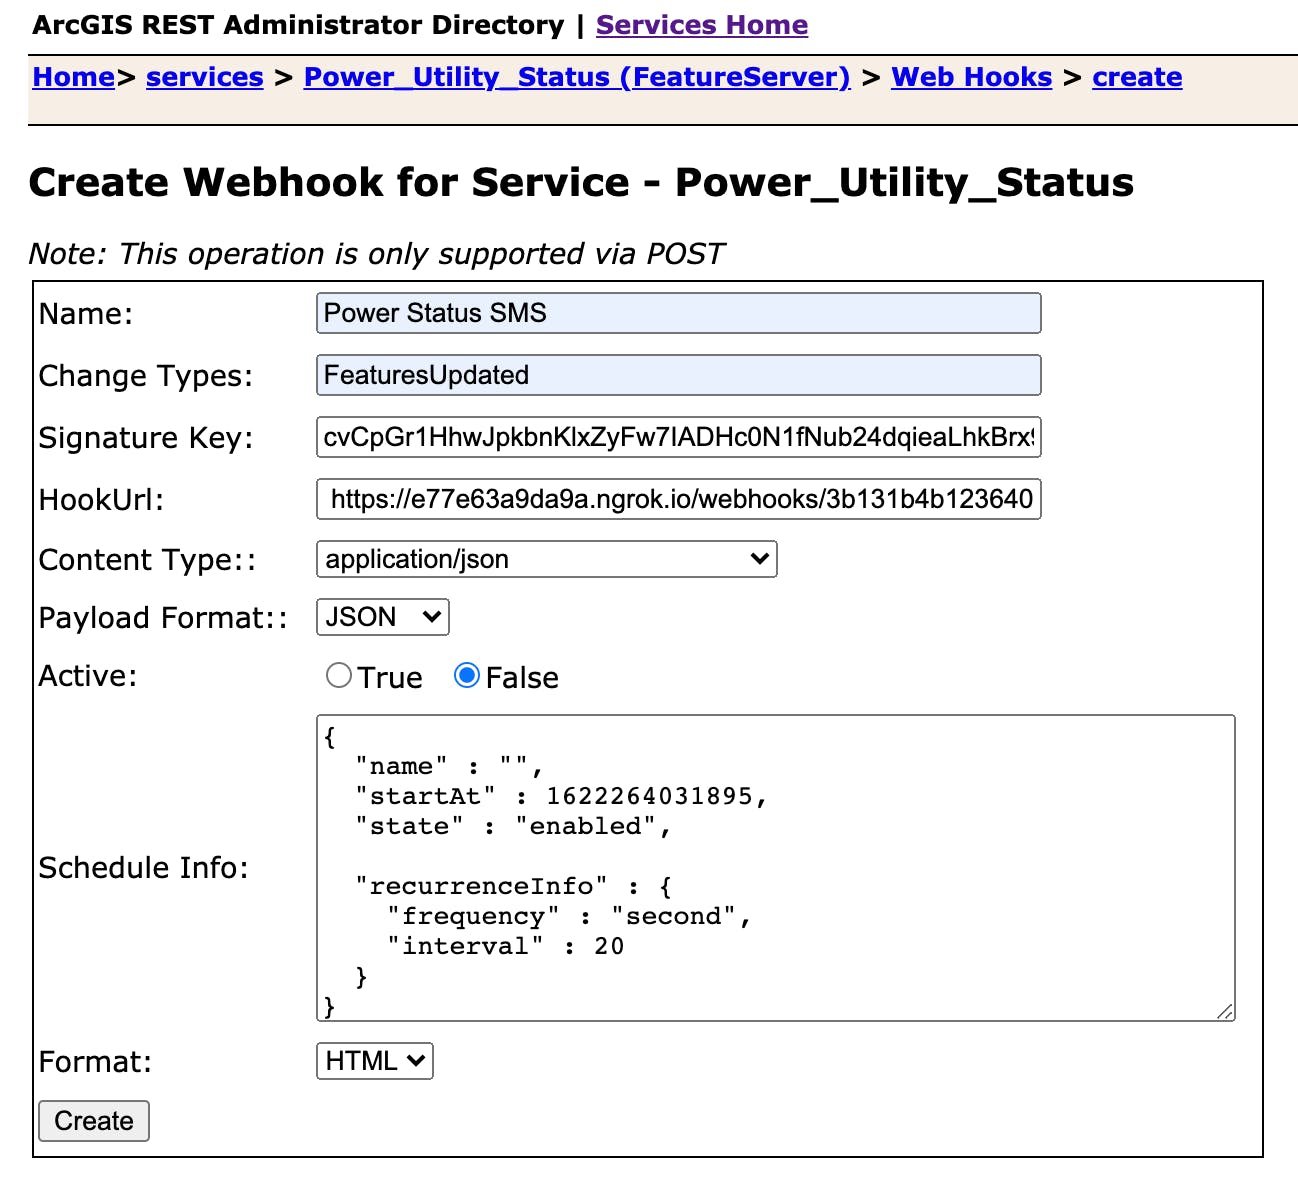
The most important fields for our setup are:
Change Types
Signature Key
HookUrl
Change Types
The field Change Types specifies the events that will trigger the webhook. For example, you can get notified when new features are created, deleted, or in our case updated. You can see all the options here.
Signature Key
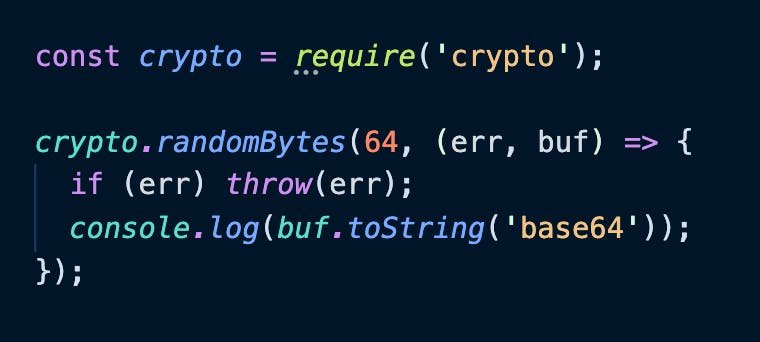
The Signature Key is a secret key that Esri will use to ‘sign’ the request. We will then use Esri’s signature to verify the authenticity and integrity of the request. Basically, we’re cryptographically verifying that the request is coming from Esri and hasn’t been tampered with. I will go over this topic more, but you can learn more about HMAC for message authentication here. The Signature Key will be used by Esri to sign the request, and again in our application to verify it. The key can be any string you define, but for security best practices, I used Node.js’s core crypto library’s randomBytes() method to create a random 64bit string. In a production environment, you need to safeguard this string. Do not commit it to version control or send it over any non-secure communication channels. In your application, store this, and any other secure keys or credentials in .env files that are ignored by your .gitignore file.
HookUrl
The HookUrl is the endpoint that your application exposes that will receive the webhook payload. This URL needs to be exposed over the internet. For development testing, you can use something like ngrok, which exposes secure introspectable tunnels to localhost.
Setting Up a Web Server with Node.Js
Node.js includes a core module, HTTP, for creating a server. However, there are many popular and well supported web frameworks available for building web applications with Node.JS. For our example, I’m using Express.js. You can see how simple it is to create the server and define our HTTP POST endpoint for receiving the webhook from Esri.

In addition to the HTTP POST webhook request, Esri will also send a HTTP GET request when a webhook is initialized, presumably as a pre-flight health check. The endpoint ‘/webhooks/:id’ will receive the webhook payload from Esri, and we will need to verify the authenticity and view the changes to the feature service features.
Verifying the Webhook with HMAC
Hash-based message authentication code, or HMAC, is signature that is produced by running a cryptographic hash function (like sha1, sha256, or md5) over some data, using a shared secret key. HMAC uses symmetrical keys, meaning that we will use the same shared secret key in our application to verify the integrity and authenticity of the request and payload. Integrity means that the payload (body of request) has not been altered, and the authenticity means that we can verify that the sender used the same secret key to sign the request.
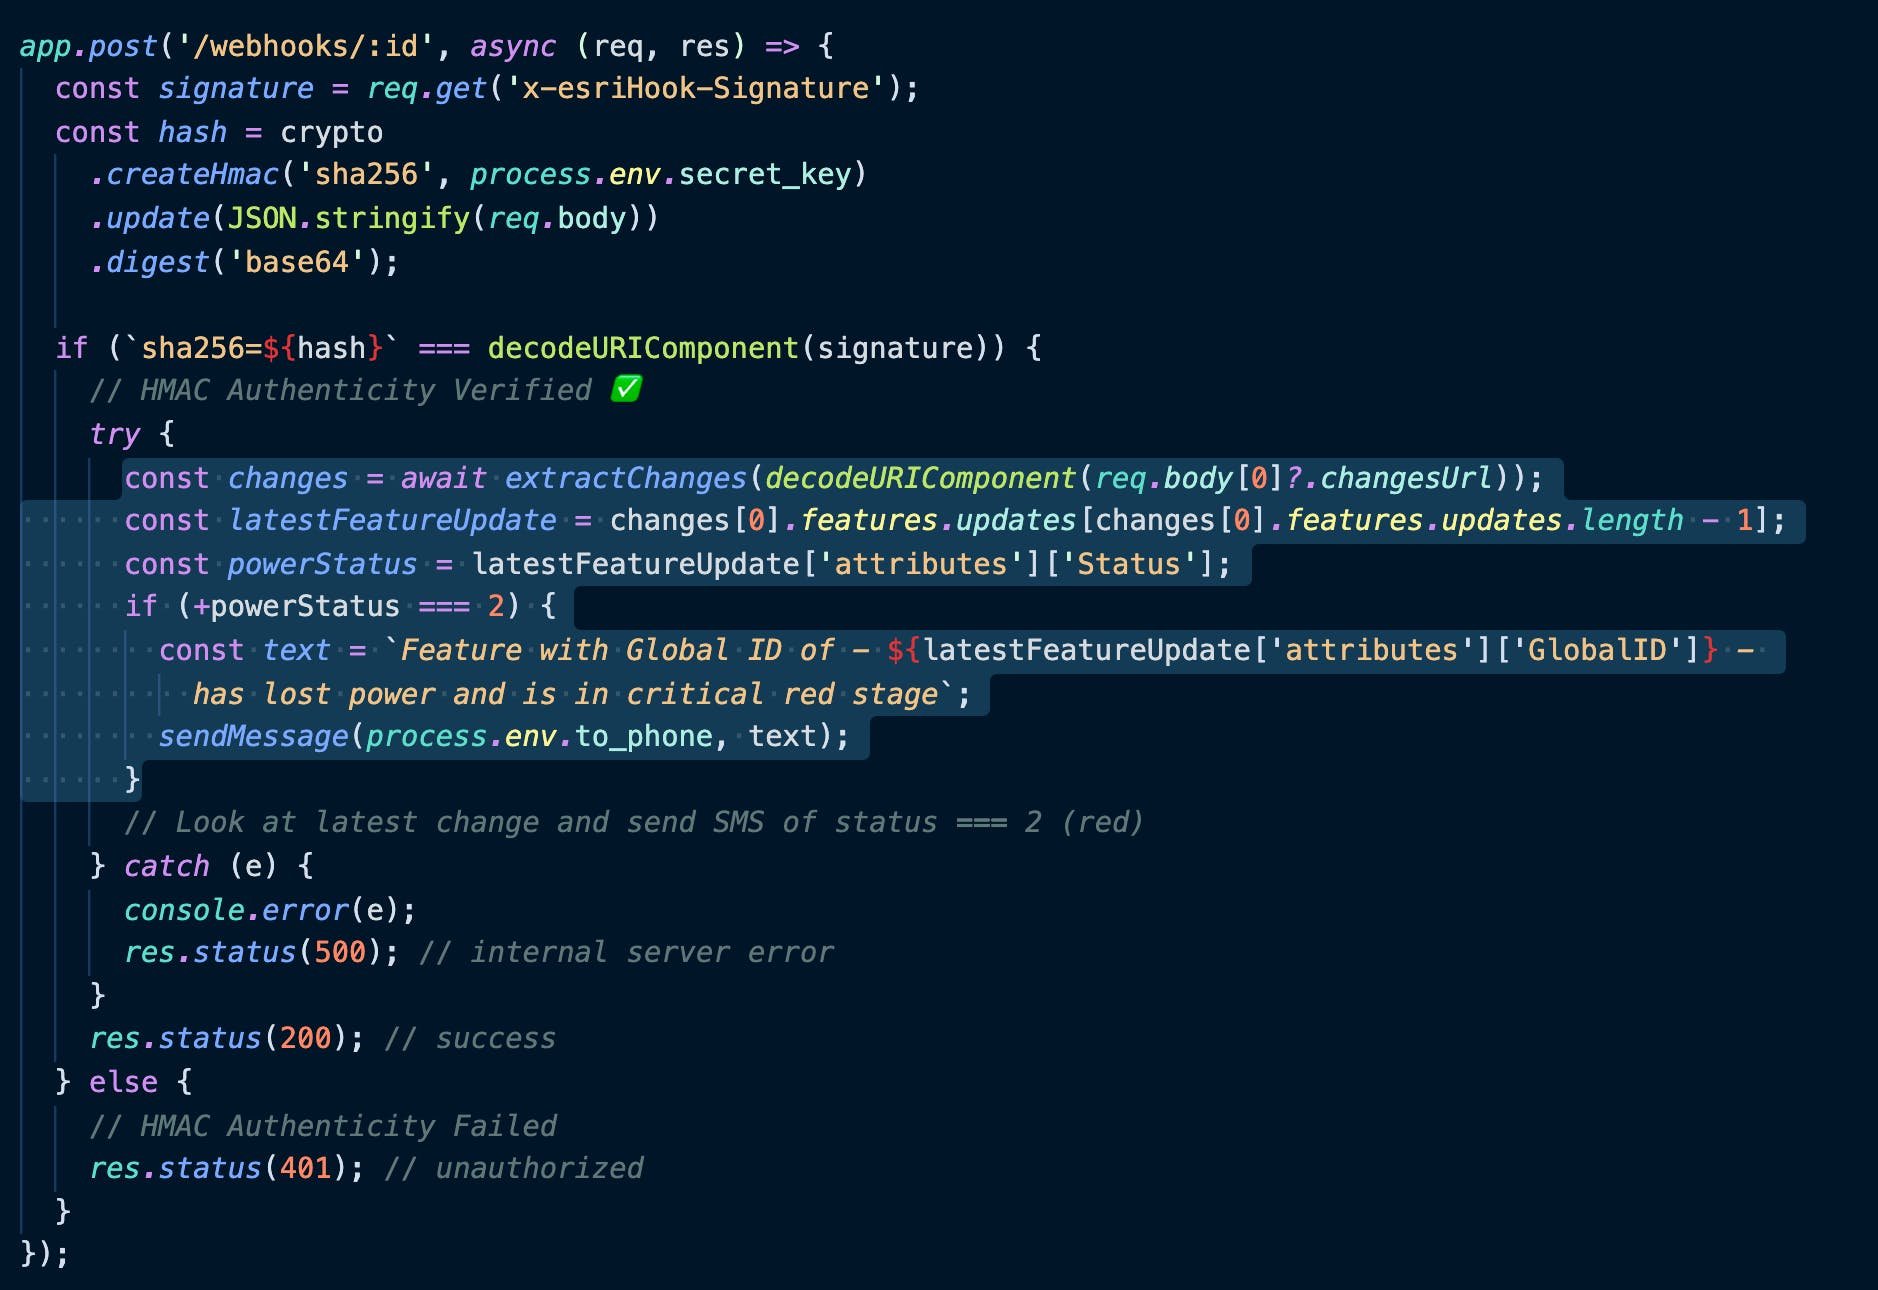
Let’s update our code to use HMAC to verify the request.
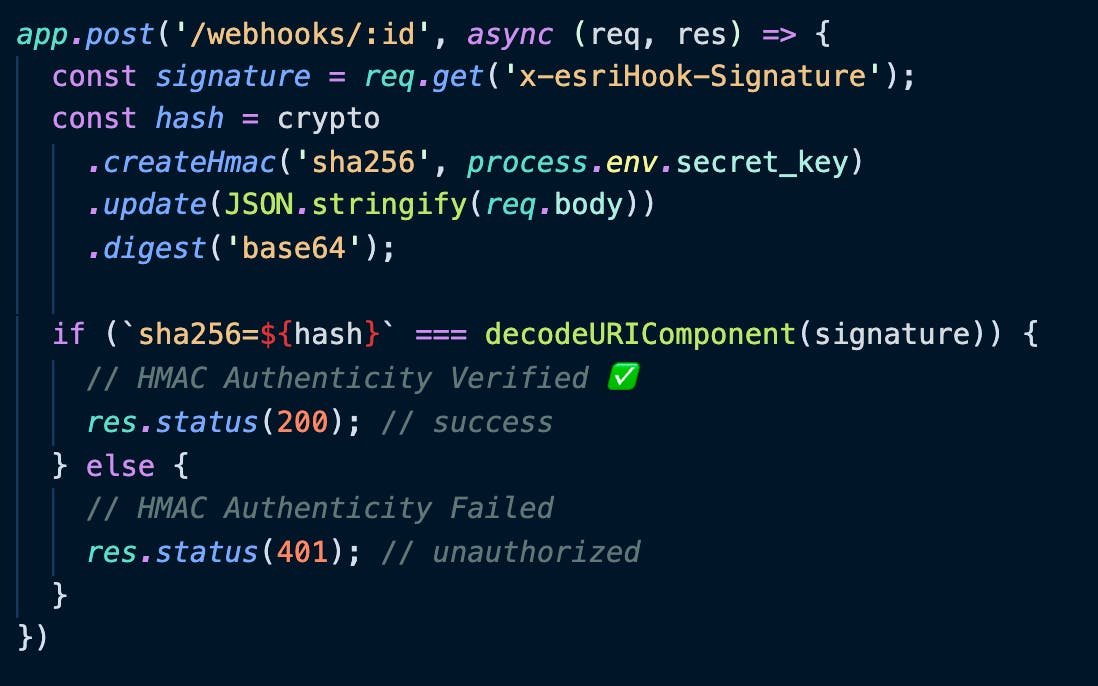
If Esri’s custom header ‘x-esriHook-Signature’ is in agreement with our hash, which uses the same secret key and hash function (sha256), we know the request came from Esri. If our hashes are not identical, we cannot verify or assume the authenticity, and respond appropriately with a HTTP 401 status (unauthorized).
Receiving Esri Feature Service Webhooks
When a feature is updated, our application needs to receive the webhook and inspect the change. If the Power Status field for the updated feature indicates that the location has a power outage, we want to send out an SMS message for crews to investigate and restore power to the affected address.
Esri introduces a multi-step process for accessing the information about what changes were made to a feature service. The webhook sends a URL, called a ‘changeUrl’ that gives us the first bit of information for finding the service changes JSON file. This ArcGIS Blog article does a good job at explaining the steps in better detail. For this article, I’ll spare the lower level code for walking through this process. The JSON file that Esri gives you access to will show the actual attribute data for the feature service behind the webhook. In our case, I’m able to see the information about what features were updated.
Below, you will see the updated code that checks the changes to see if the latest update indicates a power outage. I’m checking for a powerStatus === 2, since our status field uses the following codes: 1 = Power Working, 2 = Intermittent Power, 3 = Power Outage. If there is a power outage, we will send a SMS message which includes the Global ID of the feature.
Sending SMS Messages with Twilio
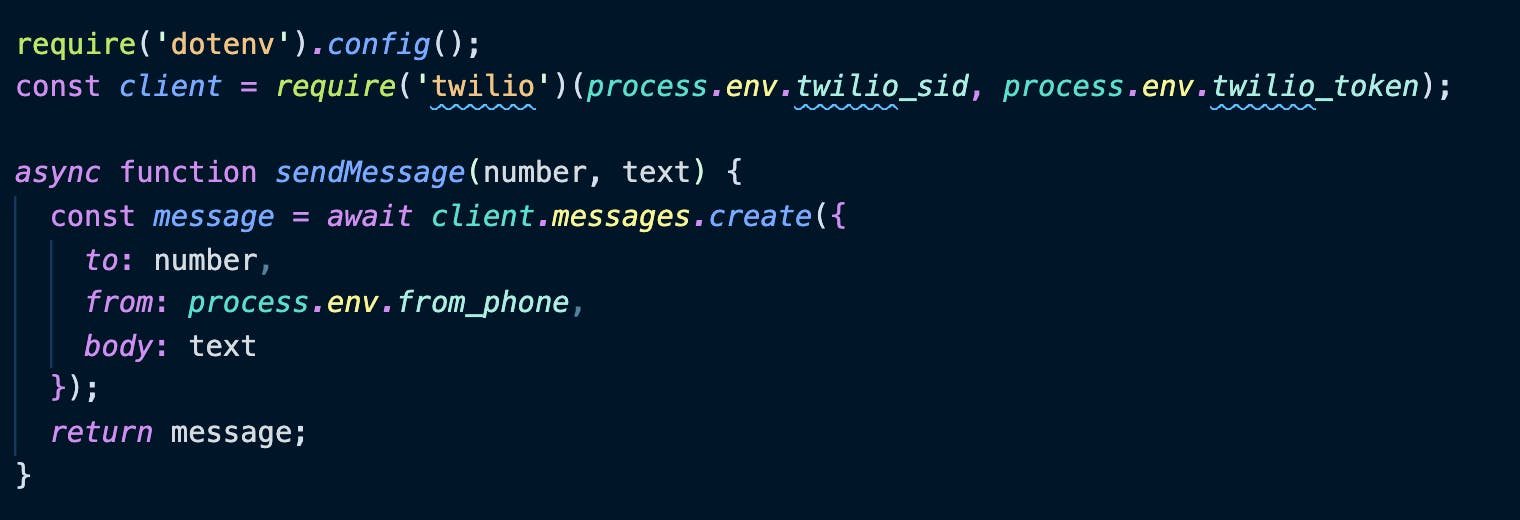
Twilio Messaging is an API for developers to send and receive SMS and MMS messages from their applications. There is a Twilio Library for integration into Node.JS applications through an intuitive interface.
You can see how simple it is to create a message with Twilio and Node.JS. I registered a phone number through Twilio’s administrative UI, and we’re sending custom text to a defined outgoing phone number for testing.
Webhooks in Action
With everything set up, now it’s time to test out the entire workflow! In ArcGIS Online, I edited a feature by changing the Power Status to ‘Red’ to indicate that a location is experiencing a power outage.

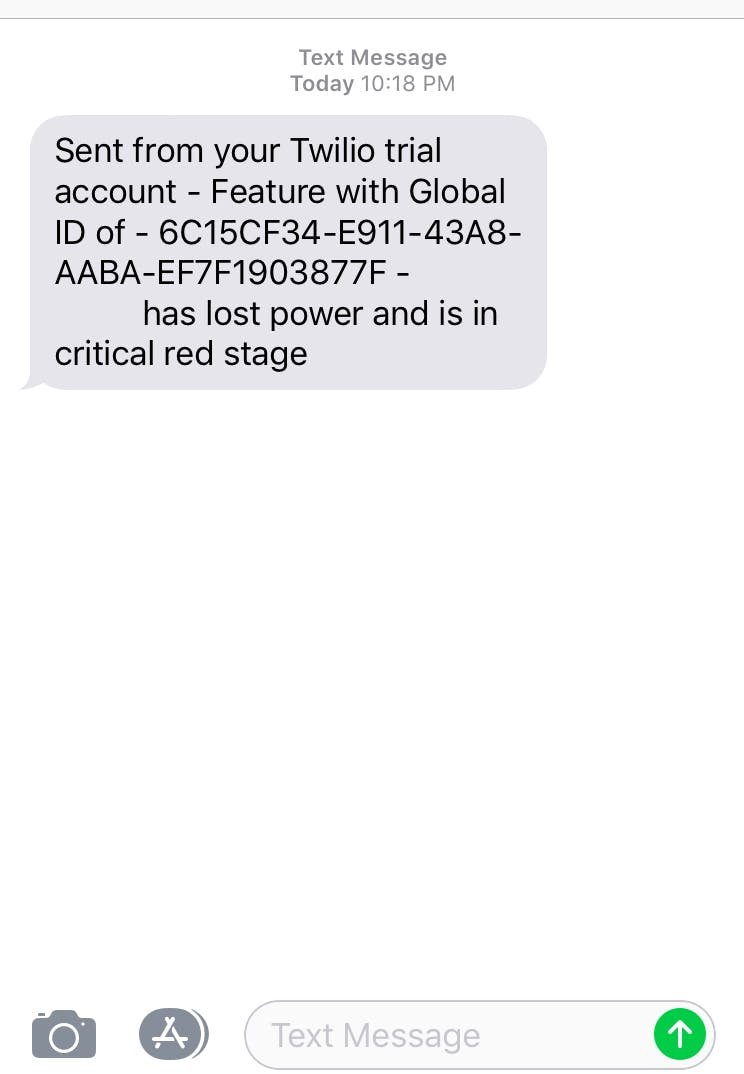
After the feature was edited with the new Power Status, Esri sent a HTTP POST request to our API endpoint. The authenticity and integrity were verified using HMAC, and the JSON change file was streamed securely into our application. The Power Status indicated an outage, and a SMS message was sent out, showing the feature’s Global ID.
A screenshot from the mobile device is shown below:
Wrap Up
Webhooks are a great addition to the ArcGIS ecosystem. Including HMAC for security allows us to cryptographically trust the origin and integrity of the request, and should be used for all webhook workflows. Node.JS and the excellent library of available libraries provided everything we needed to accomplish this workflow.
Are you thinking about extending ArcGIS, or have advanced needs to support your needs? Contact Us and we can explore the ways in which we can help.